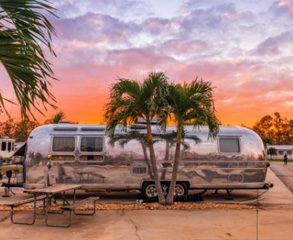


How to Hook Up Your RV: Essential Tips for Beginners
One of the most common questions for RV newcomers is, "How do I hook up my RV?" While there's no one-size-fits-all answer, developing a routine and maintaining awareness during the process can make all the difference. This approach not only ensures that no steps are overlooked but also helps prevent contamination, electrical shocks, and keeps your feet dry. Let's explore some essential tips for hooking up your RV at the campsite.
Before You Set Up
Before backing into your campsite and leveling your rig, it's crucial to perform some checks:
- Inspect Electrical Outlets: Ensure the site's electrical outlets are functioning properly by checking for polarity and voltage.
- Assess Water Quality: Examine the water source for clarity and odor to ensure it's safe to use.
- Check Sewer Inlet: Ensure the sewer inlet is clear of rocks, cans, and debris.
While you're there, rinse off the vehicle's water source and spray it with a household disinfectant. This precaution helps sanitize your connections before you start setting up.
Hooking Up at the Campsite
Once your RV is positioned and leveled, follow these simple steps to ensure a smooth hookup:
1. Connect the Electrical Cord
- Safety First: Ensure your hands and the ground are dry.
- Turn Off the Breaker: Always turn off the breaker switch before inserting or removing the electrical plug to prevent shocks and damage to the plug prongs.
2. Set Up the Water Connection
- Use a Water Pressure Regulator: Attach this to protect both your drinking water hose and the RV's plumbing from sudden pressure surges.
- Install a Water Filter: Follow the regulator with a filter to remove sediment.
- Connect the Drinking Water Hose: Run water through the hose to clear air before attaching it to the RV.
For quick and easy connections, consider using quick-connect fittings available at RV accessory shops or hardware stores.
Save Sewer Hookups for Last
After securing the water connections, proceed to the sewer hookup:
- Wear Gloves: Use disposable polyethylene gloves for hygiene when handling the sewer hose.
- Secure the Sewer Hose: Ensure it is properly connected to both the RV and the sewer inlet.
- Manage Wastewater Valves: Open the gray water valve first. Keep the black water valve closed until ready to dump to maintain liquid levels for better flushing.
Dumping the Holding Tanks
Dumping the tanks is straightforward:
- Black Water First: Always dump the black water tank first, then close the valve and dump the gray water to rinse the sewer hose.
- Drain Remaining Water: Lift the RV end of the hose to drain any residual water into the sewer inlet.
After dumping, close both the gray and black water valves, cap the RV's sewer outlet, and store the sewer hose in its designated compartment.
Final Steps
To maintain your tanks:
- Add Water: Run the kitchen faucet to add a couple of gallons of water to the gray tank. Use a bucket to pour water into the black tank to prevent solids from hardening.
- Disconnect in Order: Always disconnect in reverse order: electrical first, then water, and finally sewer.
Tip: Store your drinking water hose and fixtures in a compartment separate from the sewer hose. Connect both ends of the drinking water hose to keep moisture out and prevent critters from getting in.
Ready to Hit the Road?
With these tips, you're all set to hook up your RV confidently. For more RVing advice and to find your ideal campsite, explore our resources here.
Related Articles: